
How to connect third-party websites with SEONIB
Последнее обновление:3/26/2026

The Self-Hosted Website feature enables you to swiftly create a branded content site within SEONIB for showcasing and publishing AI-generated blog content, as well as capturing SEO traffic.
With this feature, you can operate an accessible content site without needing to set up additional servers or website systems.
I. Connecting Your Self-Hosted Website
1. Steps:
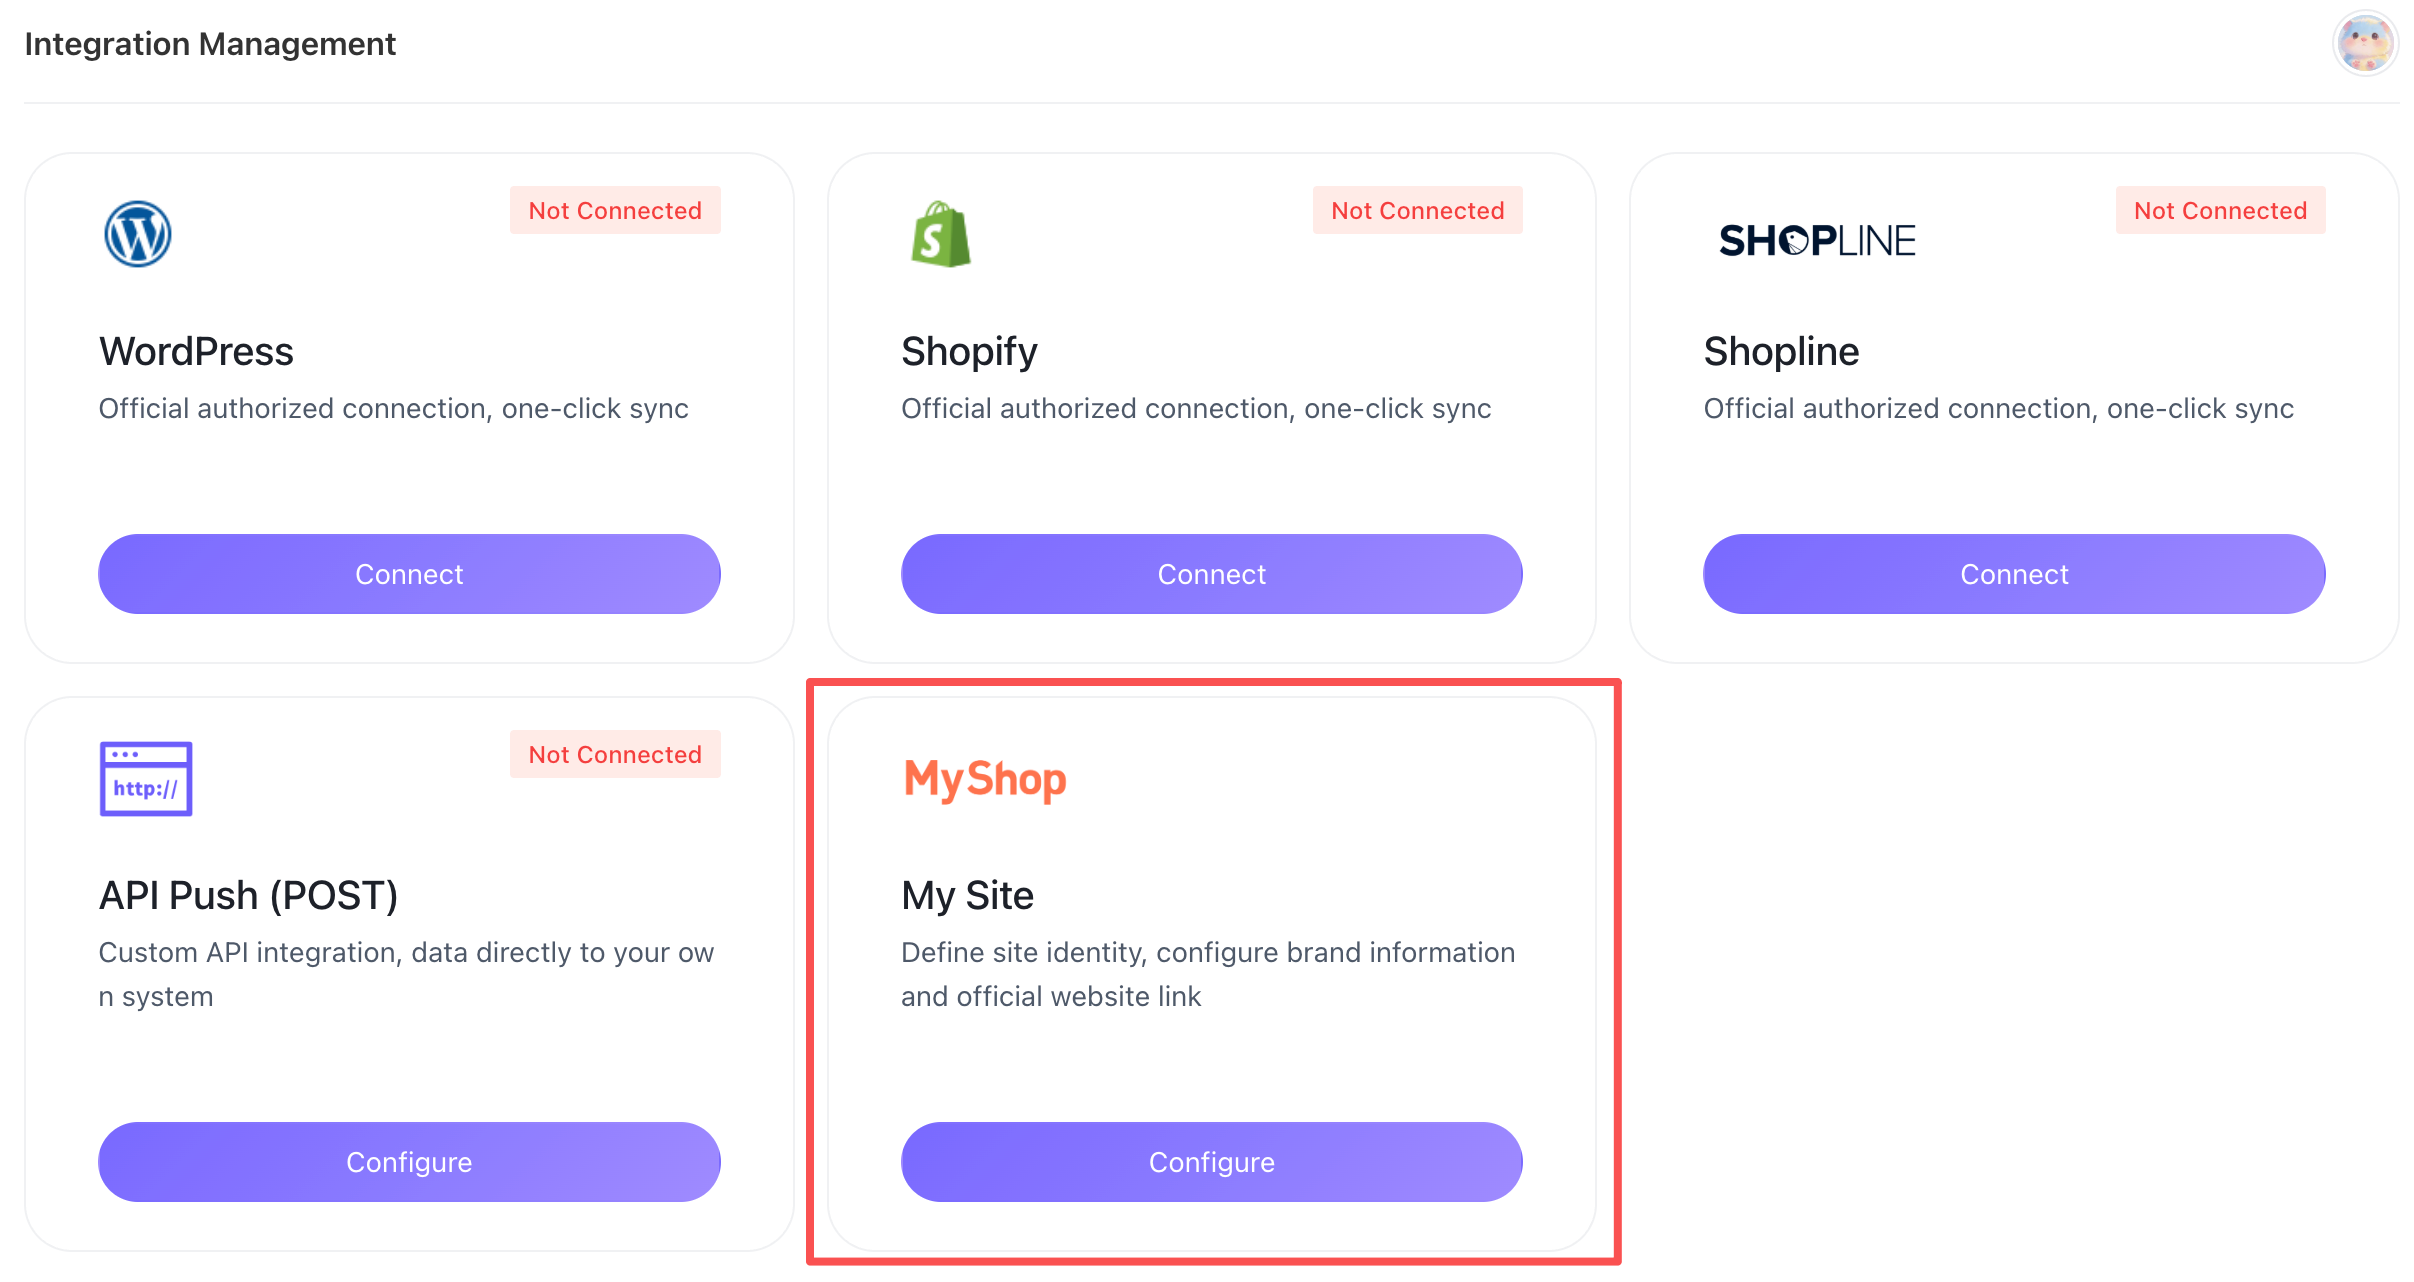
• Go to Integration Management
• Locate My Websites (MyShop)
• Click Configure to open the Website Configuration window.
2. Configuration Information:
• Logo (Optional)
Upload your brand logo. It will appear on your website pages.
• Website Name (Required)
Enter your website name. This name will display on the homepage.
• Multilingual Support
Select the languages your website supports (multiple selections allowed). The system will automatically generate corresponding content pages for each selected language.
Example: English, Chinese, Japanese
• Temporary Domain
After creating your website, the system will automatically assign an access address, such as:
https://xxxx.site.seonib.comYou can access your website directly through this address.
II. How to Publish Articles to Your Own Website
After creating your website, you can publish the generated content directly to it.
Steps:
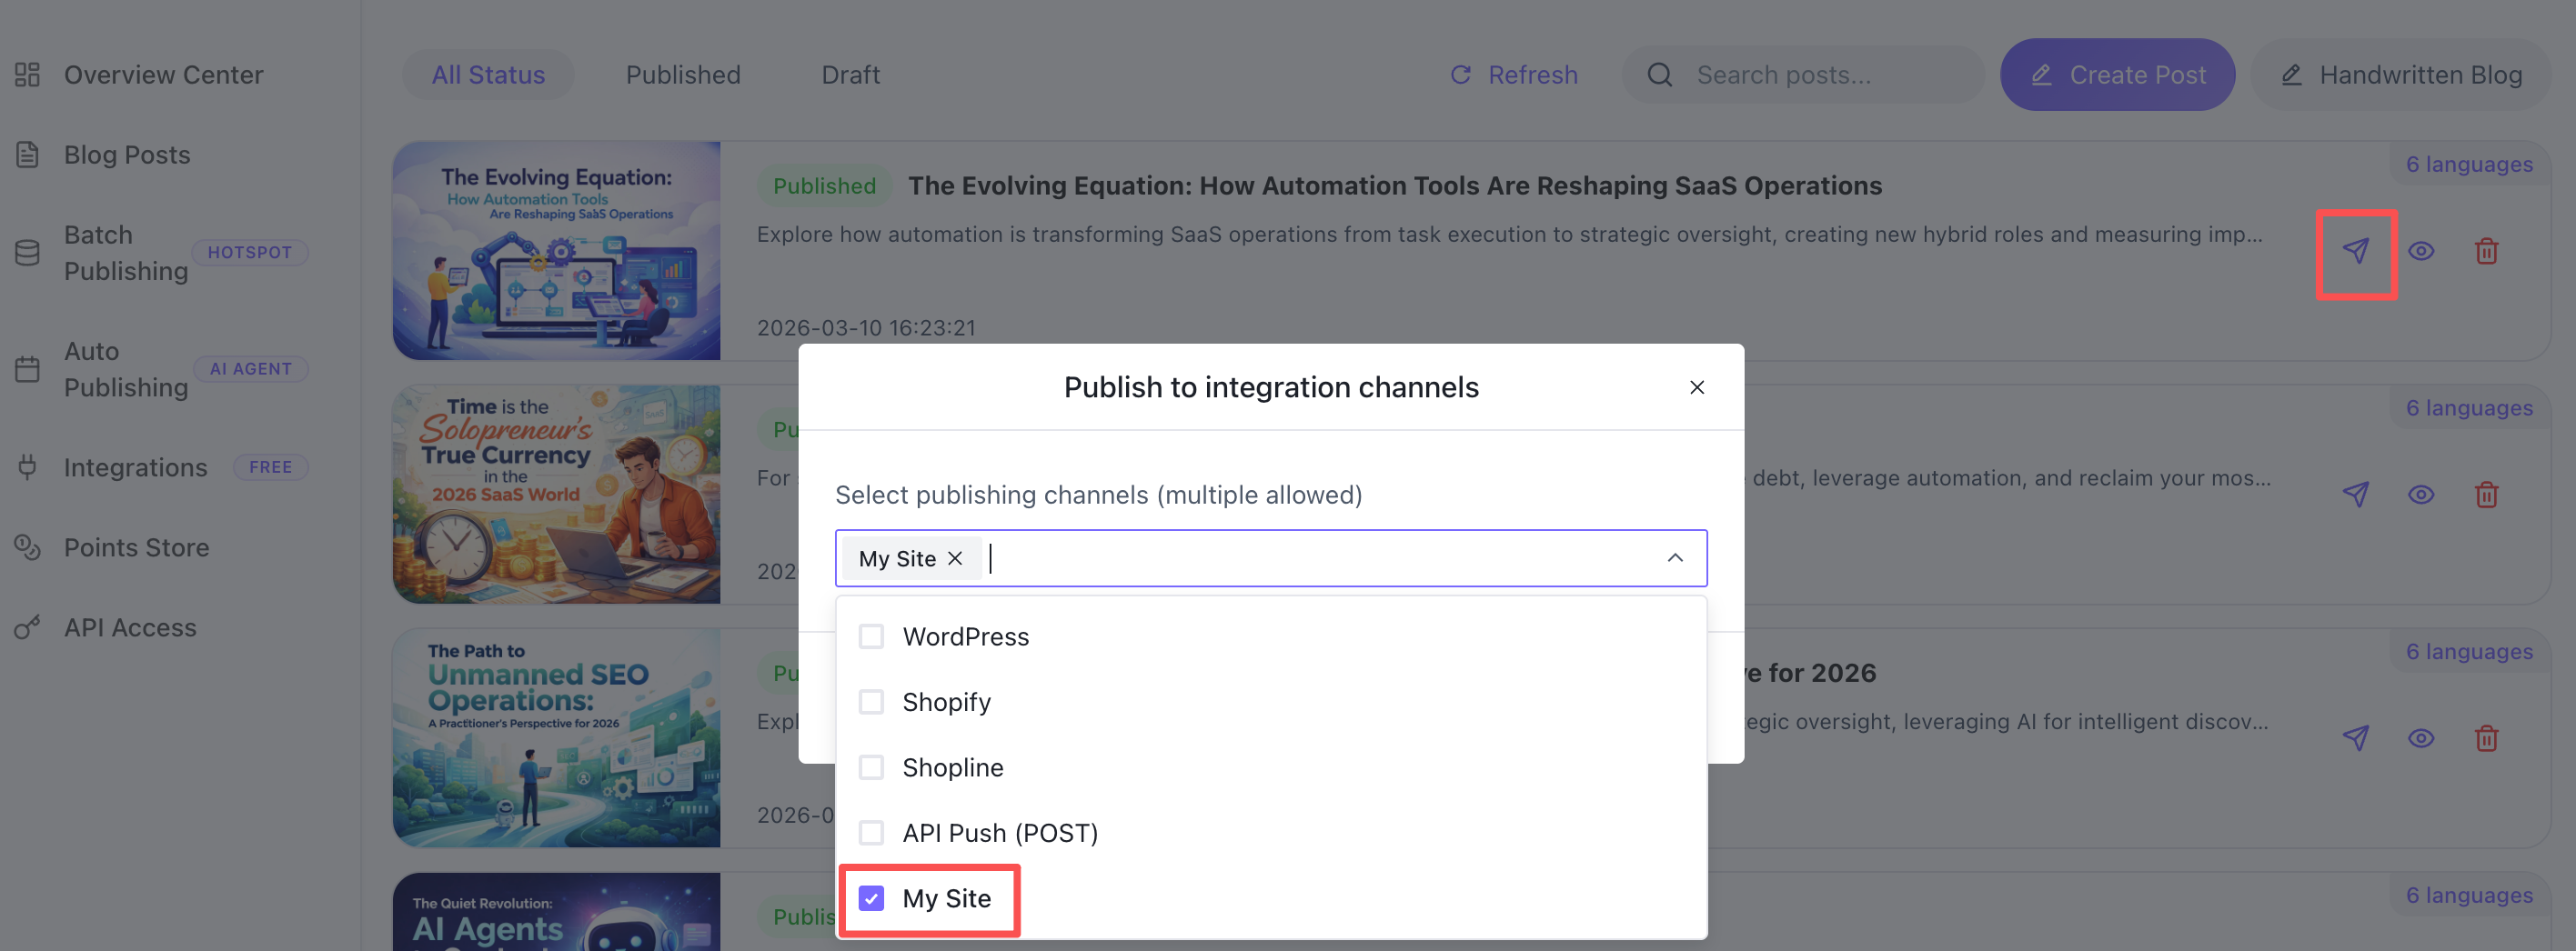
1. Go to the Blog List and select the article you wish to publish.
2. Click Publish and choose MyShop.
3. Confirm the publication, and the article will automatically appear on your website.
4. After successful publication, you can access it via:
1. Open the temporary domain.
2. Visit the article URL in your browser, where visitors can directly read your blog content.
Example:
https://xxxx.site.seonib.com/blog/seo-strategy-2026III. Custom Domain Binding Guide
After creating your blog, the system will assign a default access address, such as:
https://gjqfayqwrdeolxjhbcex.site.seonib.comIf you wish to access your blog using your own domain name (e.g., blog.example.com), you can bind a custom domain name using one of the following two methods.
Method 1: DNS CNAME Binding (Recommended)
This is the simplest and most common method, requiring only the addition of a DNS resolution record in your domain registrar's backend.
The function of a CNAME record is to point one domain name to another. When accessing your domain name, users will actually be directed to our blog service.
1. Log in to your domain registrar's backend
For example:
•Cloudflare
•Alibaba Cloud
•Tencent Cloud
•GoDaddy
•Namecheap
Enter DNS resolution management.
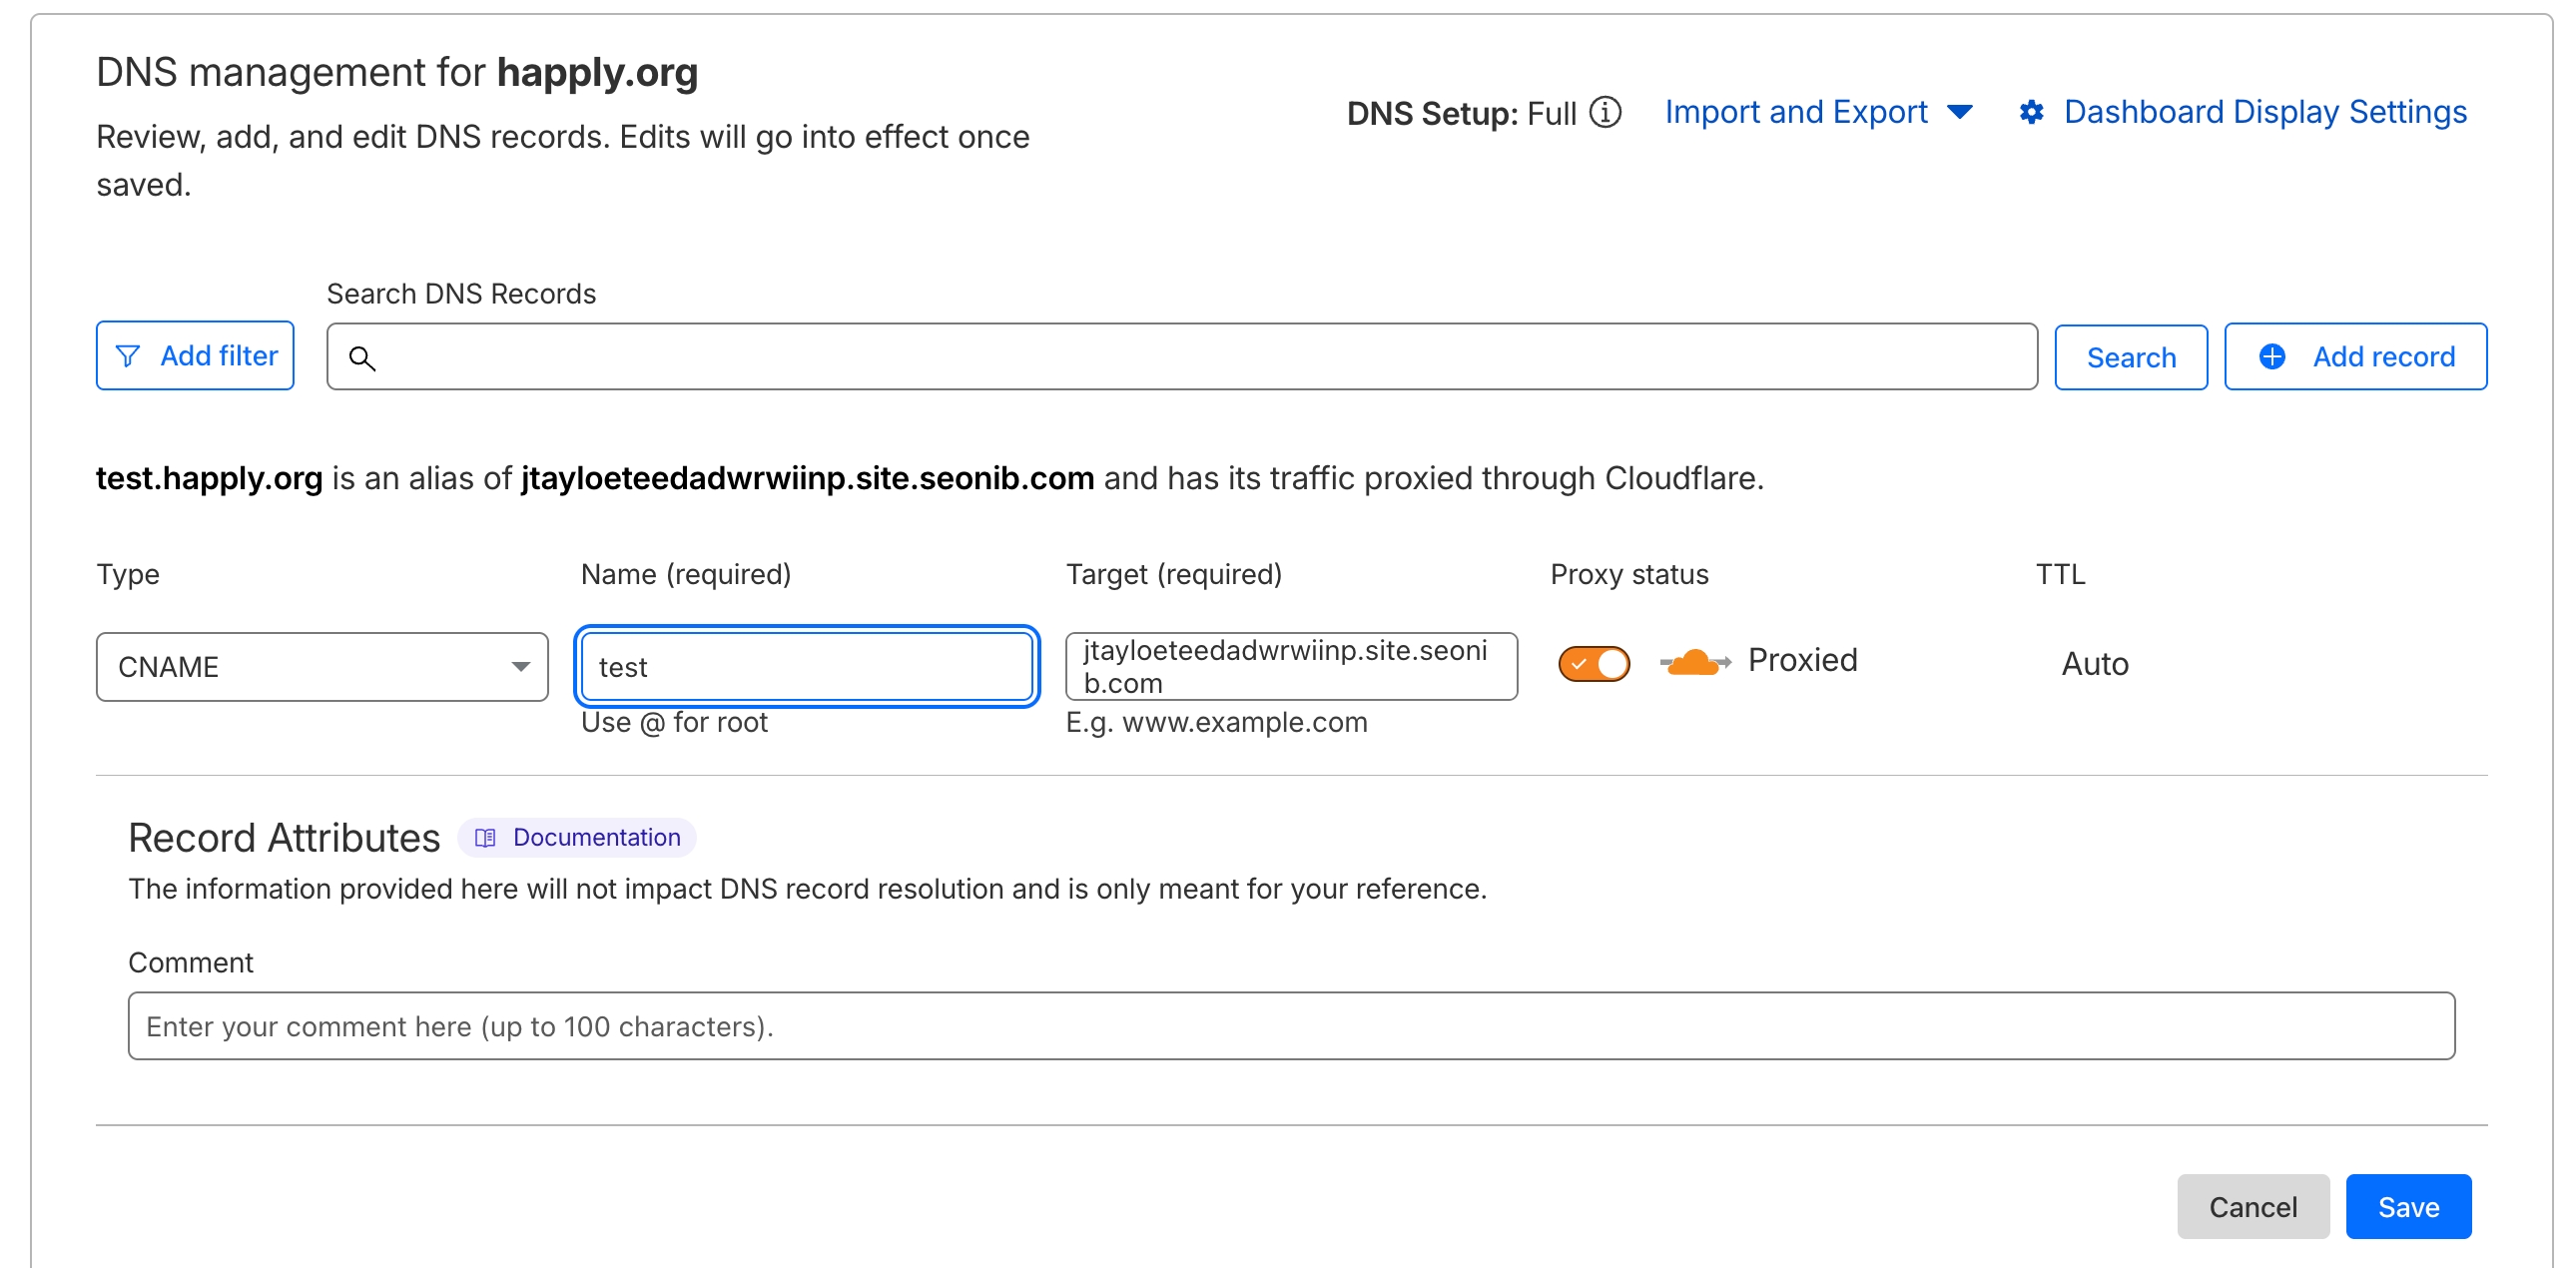
2. Add a CNAME record
Suppose you want to use:
blog.example.comThen you need to add the following resolution:
| Type | Host record | Points to address |
|---|---|---|
| CNAME | blog | gjqfayqwrdeolxjhbcex.site.seonib.com |
Example:
blog.example.com
        ↓
gjqfayqwrdeolxjhbcex.site.seonib.com
3. Wait for DNS propagation
Typical DNS propagation time:
5 minutes - 30 minutesMaximum possible duration:
24 hoursOnce propagated, you can access your blog via:
https://blog.example.comVisit your blog.
Method 2: Server Reverse Proxy (Nginx / Apache)
If your website is already deployed on your own server and you wish to access the blog via a specific path, for example:
https://example.com/blogs/You can use a reverse proxy approach.
The function of a reverse proxy is: after the server receives a user request, it forwards the request to the target service and then returns the result to the user.
Nginx Configuration Example
Add the following to your Nginx configuration file:
location /blogs/ {

    # Transparent transmission of real domain names
    proxy_set_header X-Forwarded-Host $host;
    proxy_set_header X-Real-Host $host;
    proxy_set_header X-Forwarded-Prefix /blogs/;

    # Specify the blog service address
    proxy_set_header Host gjqfayqwrdeolxjhbcex.site.seonib.com;

    proxy_pass http://gjqfayqwrdeolxjhbcex.site.seonib.com;
}
Note:
| Configuration Items | Effect |
|---|---|
| X-Forwarded-Host | Pass the original domain name accessed by the user |
| X-Real-Host | Deliver Authenticity Host |
| X-Forwarded-Prefix | Specify the system blog mount path |
| proxy_pass | Forward to blog service |
The X-Forwarded-Host header is typically used to identify the domain name of the user's original visit when accessing a backend through a proxy.
Accessing Your Blog via Custom Domain
After successful configuration:
https://example.com/blogs/will allow you to access your blog content.
Comparison of the Two Methods
| Type | Difficulty | Recommendation Level | Applicable Scenarios |
|---|---|---|---|
| CNAME record binding | Simple | ⭐⭐⭐⭐⭐ | Independent Blog Domain Name |
| Nginx Proxy | Moderate | ⭐⭐⭐ | Blog as a subpath of the website |
Example:
CNAME Mode :blog.example.com

Reverse Proxy Mode:example.com/blogs/
💡 We recommend using the CNAME method for its simplicity, stability, and lack of server maintenance requirements.
IV. Frequently Asked Questions
1. Do I need a server for my own website?
No. SEONIB automatically provides website hosting services.
2. Can I bind my own domain name?
Yes, you can bind it via DNS CNAME records or Nginx proxy configuration.
3. Can I modify website information?
Yes. Go to “Integration Management → My Websites → Configuration” to modify:
• Logo
• Website name
• Multilingual settings
4. Can website content be indexed by search engines?
Yes. Your website supports:
• SEO-friendly URLs
• Search engine crawling
• Multilingual content
Published articles can be indexed by search engines.